 |
Last additions - 1999 Jeep WJ pics |
 |
|

931 viewsTrimmed the trim piece to fit cutting the door side off so as to keep the part that went around the fender so it would look like it was meant to be there and would still have the mounting screw holes to attach it with. Mar 11, 2019
|
|

995 viewsPinch weld ground back significantly. Most people beat that over flat or cut it out and weld a flat piece back. Not needed in my case. any larger tire and I would have to. Mar 11, 2019
|
|

1024 viewsAll folded over and also the lower part now cut and folded as well Mar 11, 2019
|
|

968 viewsSide view. I would be grinding back the pinch weld quite a bit too. Mar 11, 2019
|
|

910 viewsFolded over to make the new edge Mar 11, 2019
|
|
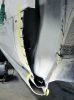
961 viewsAnother view of the slits I cut in it. Mar 11, 2019
|
|

963 viewsremoved one piece of tape and cut slits all the way down the piece so it could be folded over to make a nice edge. Not only to eliminate the sharp thin edge but, to make it stronger and to have something to mount the trim piece back to once I cut it down to size. Mar 11, 2019
|
|

952 viewsFirst piece cut out. Mar 11, 2019
|
|
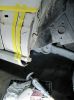
941 viewsCutting the first section out. Mar 11, 2019
|
|

1001 viewsThe first one took me a few hours as I was designing and figuring out how much to cut etc as I went. Taped off the final measurement remembering to leave some to make a folded edge out of. Mar 11, 2019
|
|

975 viewsNow to trim the back of the front fenders. First thing, remove the trim. Mar 11, 2019
|
|

1012 viewsFront bumper lower part trimmed Mar 11, 2019
|
|

982 viewsPass side trimmed Mar 11, 2019
|
|

1075 viewsDriver side trimmed Mar 11, 2019
|
|
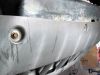
979 viewsnew blots to mount the bottom of the bumper cover. There are 4 down there and this one was missing almost all. Mar 11, 2019
|
|

1002 viewsI reused the cut pieces and riveted them back to the trimmed bumper corners so I would have a nice edge instead of a narrow cut one and a way to mount the inner fenders back to it. I would epoxy glue those later in this process for stability as those rivets would never last by themselves under off roading conditions. Mar 11, 2019
|
|

981 viewsYou can see how well the inner fender worked out in the front and that shiny bolt is where I had to move it forward 2 inches from the black plastic clip you also see in there Mar 11, 2019
|
|

1029 viewsI kept trimming until I got the look I was after Mar 11, 2019
|
|
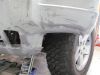
1013 viewsLower bumper section removed Mar 11, 2019
|
|

1021 viewsTrimmed the back edge as well just like the other side. Mar 11, 2019
|
|
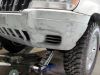
987 viewsNow to cut the driver side bumper cover Mar 11, 2019
|
|

1000 viewsWorking out a way to mount the inner fender to the newly trimmed bumper cover so I wouldnt have to cut it as well. It worked out perfect. Mar 11, 2019
|
|

958 viewssecondly I trimmed a bit off the back edge of the side of it. I did end up taking a wee bit more than pictured here. Mar 11, 2019
|
|

987 viewsFirst I cut out a large slot in the lower end of the bumper cover Mar 11, 2019
|
|
|
|


