
1002 viewsI reused the cut pieces and riveted them back to the trimmed bumper corners so I would have a nice edge instead of a narrow cut one and a way to mount the inner fenders back to it. I would epoxy glue those later in this process for stability as those rivets would never last by themselves under off roading conditions.
|
|
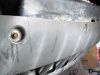
979 viewsnew blots to mount the bottom of the bumper cover. There are 4 down there and this one was missing almost all.
|
|

1071 viewsDriver side trimmed
|
|

980 viewsPass side trimmed
|
|

1012 viewsFront bumper lower part trimmed
|
|

973 viewsNow to trim the back of the front fenders. First thing, remove the trim.
|
|

999 viewsThe first one took me a few hours as I was designing and figuring out how much to cut etc as I went. Taped off the final measurement remembering to leave some to make a folded edge out of.
|
|
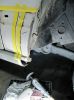
940 viewsCutting the first section out.
|
|

951 viewsFirst piece cut out.
|
|

962 viewsremoved one piece of tape and cut slits all the way down the piece so it could be folded over to make a nice edge. Not only to eliminate the sharp thin edge but, to make it stronger and to have something to mount the trim piece back to once I cut it down to size.
|
|
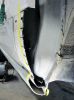
960 viewsAnother view of the slits I cut in it.
|
|

904 viewsFolded over to make the new edge
|
|

966 viewsSide view. I would be grinding back the pinch weld quite a bit too.
|
|

1020 viewsAll folded over and also the lower part now cut and folded as well
|
|

995 viewsPinch weld ground back significantly. Most people beat that over flat or cut it out and weld a flat piece back. Not needed in my case. any larger tire and I would have to.
|
|

929 viewsTrimmed the trim piece to fit cutting the door side off so as to keep the part that went around the fender so it would look like it was meant to be there and would still have the mounting screw holes to attach it with.
|
|

961 viewsTrim cut to fit and ready to mount
|
|

1005 viewsI custom trimmed the end cap as well so it would fit back on and look like it came that way.
|
|

970 viewsThe amount of tools needed for this job.
|
|

985 viewsI sanded it down and prepped it for primer
|
|

1053 viewsPrimed it well.
|
|

1342 viewsWhile pass side primer was drying I moved to the driver side. This one went much quicker like under an hour now that I had the process down pat.
|
|

927 viewsRemove trim.
|
|

962 viewscleaned the panel
|
|
|
|


