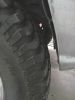
948 viewsHere you can see how close the front ones are to front bumper
|
|

929 viewsAFTER the lift.
|
|

925 viewsA bit close on front bumper !
|
|

903 viewsA bit close on back of front fender !
|
|

1028 viewsI expected it to rub the lower short arm but it does not. Many use wheel spacers due to that but I will not have to.
|
|

960 viewsBumper cover removed as I begin the trimming of the front
|
|
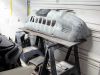
927 viewsBumper cover removed.
|
|
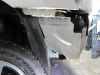
916 viewsPass side. That piece of metal is usually completely removed on these type of jobs but, I decided not to. I cut it and bent it over where the two horns are. I had to modify the horns position so that the wires came down from top instead of sticking out the back which worked well.
|
|

960 viewshorn wires in the way
|
|

915 viewsMetal cut and bent, horn wires relocated I am going to save the inner fenders too. (something else most people do away with when doing this)
|
|

1047 viewsI manipulated the inner fender and wrapped it around the horns and screwed it to the front metal bumper
|
|

1044 viewsDriver side has a windshield washer fluid reservoir that is definitely in the way. if you are planning on serious off roading this MUST be removed completely. If you still need one you can get on out of an XJ that mounts up near the brake master cyl that uses the same plug ins etc.
|
|

959 viewsAgain, saving the plastic inner fender I wrapped it around the reservoir and screwed it to the metal bumper
|
|
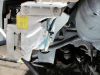
997 viewsI did another small cut and bent the metal around to protect the washer fluid reservoir.
|
|

1002 viewsView of the inner fender folded around and bolted to the lower part of the metal inner bumper
|
|

969 viewsNow I replaced the plastic bumper cover so I cut start cutting it.
|
|

987 viewsFirst I cut out a large slot in the lower end of the bumper cover
|
|

958 viewssecondly I trimmed a bit off the back edge of the side of it. I did end up taking a wee bit more than pictured here.
|
|

999 viewsWorking out a way to mount the inner fender to the newly trimmed bumper cover so I wouldnt have to cut it as well. It worked out perfect.
|
|
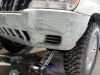
986 viewsNow to cut the driver side bumper cover
|
|

1021 viewsTrimmed the back edge as well just like the other side.
|
|
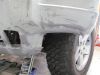
1012 viewsLower bumper section removed
|
|

1029 viewsI kept trimming until I got the look I was after
|
|

981 viewsYou can see how well the inner fender worked out in the front and that shiny bolt is where I had to move it forward 2 inches from the black plastic clip you also see in there
|
|
|
|


